

How To Draw A Realistic Zombie Step By Step
The zombie is a corpse believed to exist revived past witchcraft. Beliefs about zombies vary greatly beyond unlike religions.
Yet, zombies in different beliefs share the same behavior: they crave human flesh and they can plough a human into a zombie once that person is bitten.
The sinister appearance of zombies and the mystery that lies upon their true existence are what make them very interesting to draw.
However, because of their intricate features, information technology may seem very challenging to draw a zombie.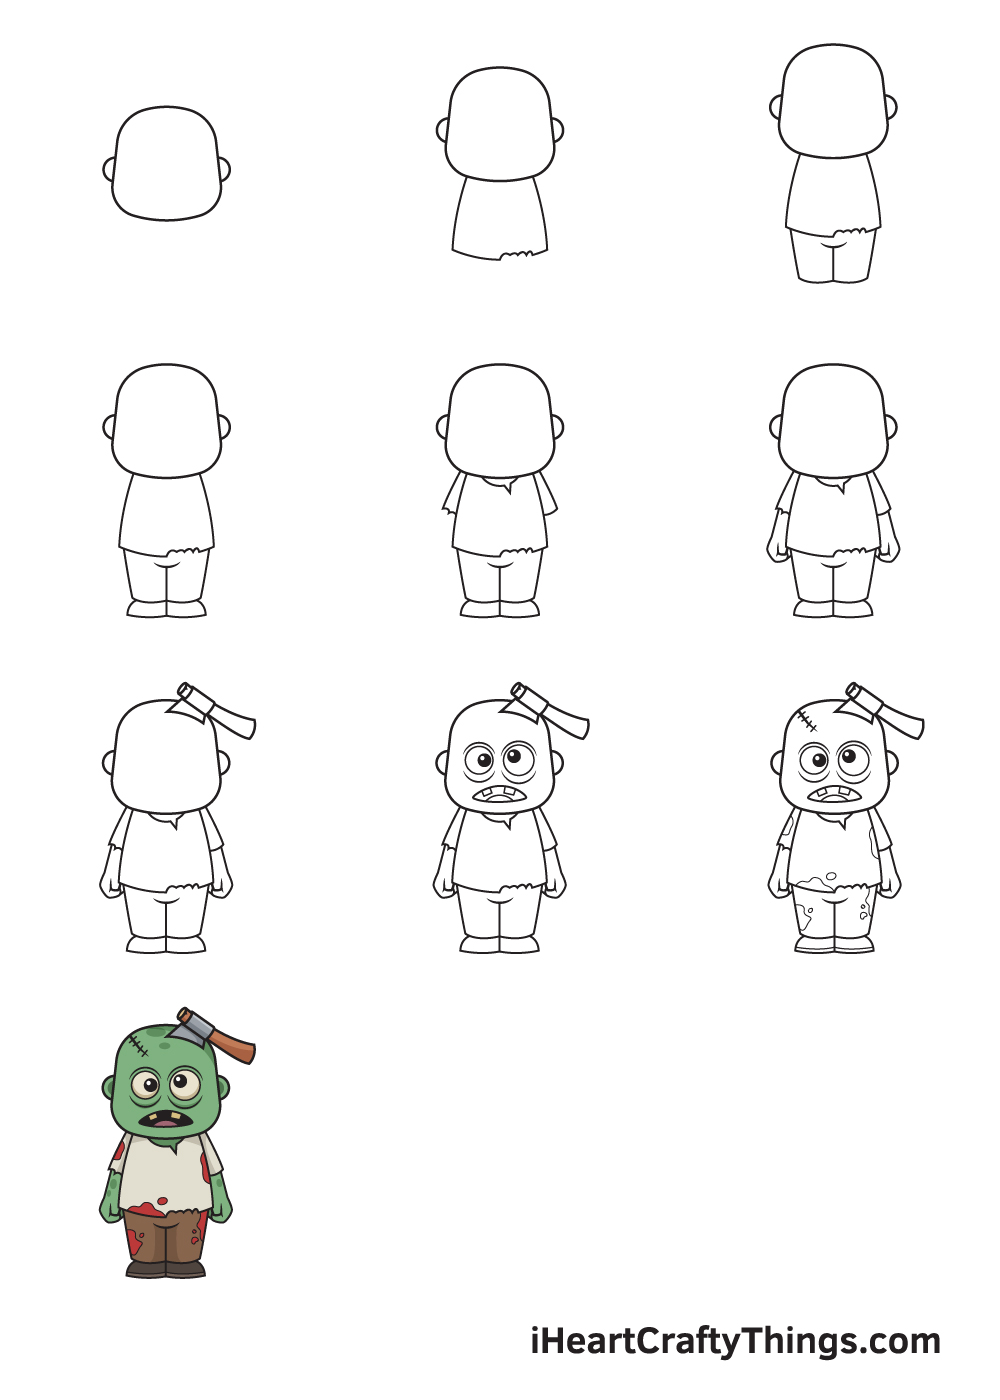
Fortunately, we have created a pace-by-step process on how to draw a zombie, summarized in 9 piece of cake and simple steps.
Every education comes with an illustration to serve as your visual guide, making the entire process a lot easier for you!
Have fun and use your creativity to draw a terrifying zombie!
What's in this Web log Post
- How to Describe a Zombie — Let'southward get started!
- Step i
- Step 2 — Outline of the Zombie's Head and Trunk
- Footstep 3 — Next, Describe Both Legs of the Zombie
- Step 4 — Then, Draw a Pair of Shoes for the Zombie
- Footstep 5 — Draw the Sleeves of the Zombie's Shirt
- Step 6 — Draw the Zombie's Left and Correct Arm
- Step 7 — Depict the Axe Struck on the Zombie's Caput
- Footstep 8 — Afterwards, Draw the Facial Features
- Step 9 — At present, Add Details and Texture on the Zombie
- Your Zombie Drawing is Complete!
How to Draw a Zombie — Let's go started!
Step one
Starting on the upper portion of your paper, describe a square with curved edges to create the caput of the zombie. Afterwards, draw a semicircle on each side of the zombie's caput to course its left and right ear.
To ensure that the zombie will be fatigued in the center, you tin can create reference lines past cartoon an intersecting horizontal and vertical line.
The vertical line above the horizontal line is where you should draw the outline of the caput.
By cartoon the head at the summit, there will be enough space for the entire body of the zombie at the bottom of the paper.
Step 2 — Outline of the Zombie'southward Head and Body
Depict two horizontal lines correct underneath the head of the zombie. The gap in betwixt the lines depends on how thick you want the zombie's body to be. The wider the gap, the beefier the zombie will look.
Afterwards, draw a horizontal line at the bottom, connecting both endpoints of the vertical line. This outlines the shirt the zombie is wearing.
Zombies typically wear damaged and dirty clothes, then don't forget to add multiple curved lines to create tears on the bottom hem of the shirt!
Step 3 — Adjacent, Draw Both Legs of the Zombie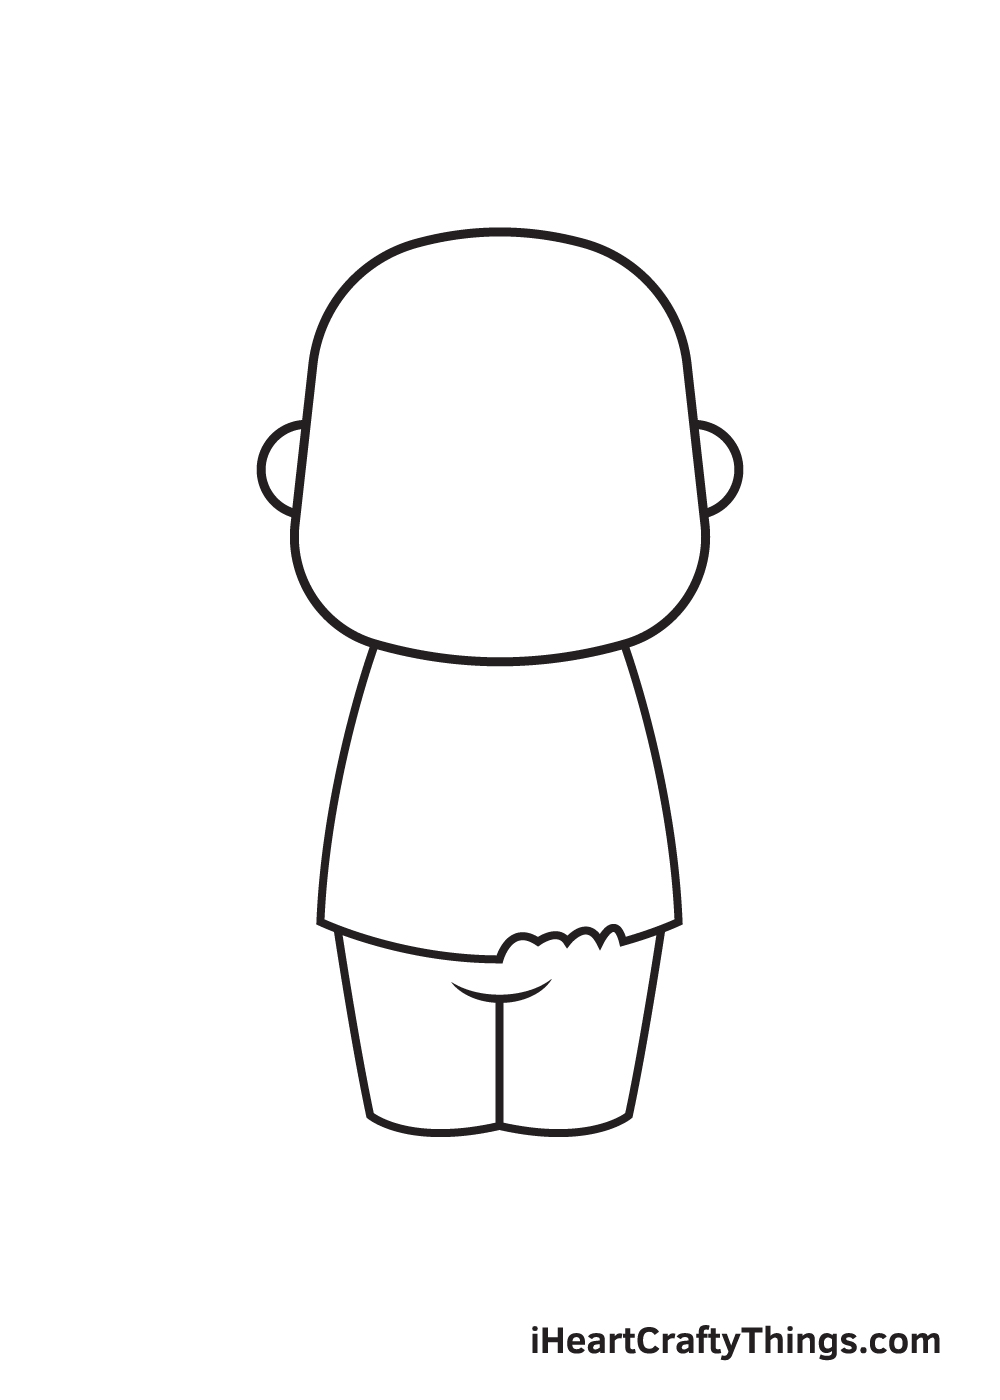
Draw two diagonal lines beneath the zombie's shirt. Then, draw a slightly curved horizontal line connecting both endpoints together. This forms the lower body of the zombie.
Subsequently, add together a short vertical line outset from the bottom in the middle of the lower trunk. Then, draw an upwards bend at the top of the vertical line. This creates a partitioning between the left and the right leg.
Step 4 — Then, Depict a Pair of Shoes for the Zombie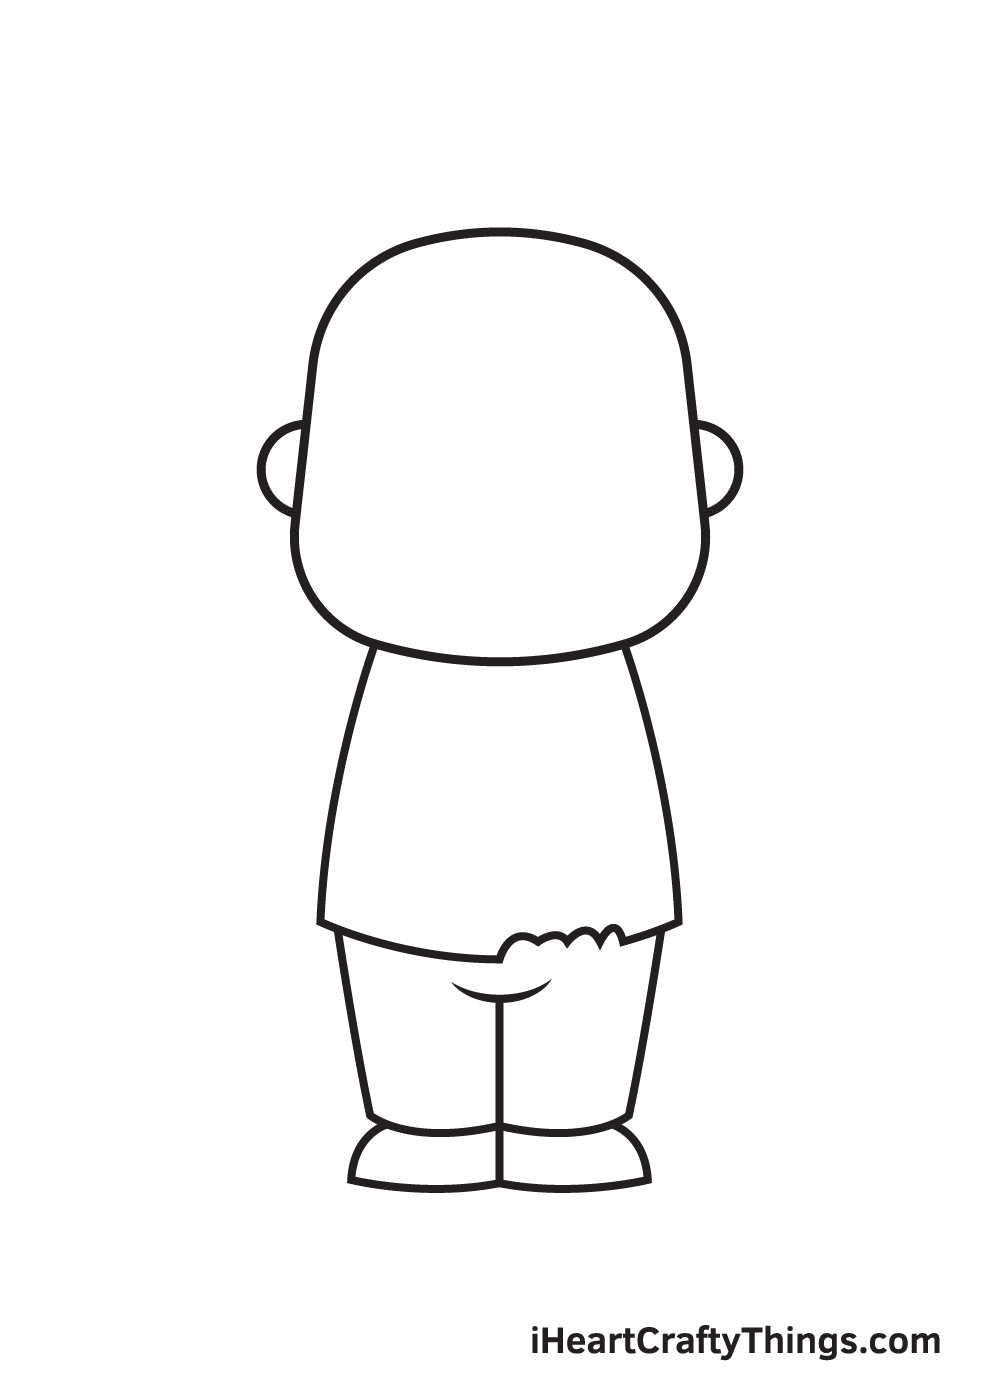
Right underneath each leg in the trousers, describe a curved line with a horizontal line at the lesser to create a pair of shoes.
As you can see in the illustration, the feet of the zombie are facing opposite directions.
Step 5 — Draw the Sleeves of the Zombie's Shirt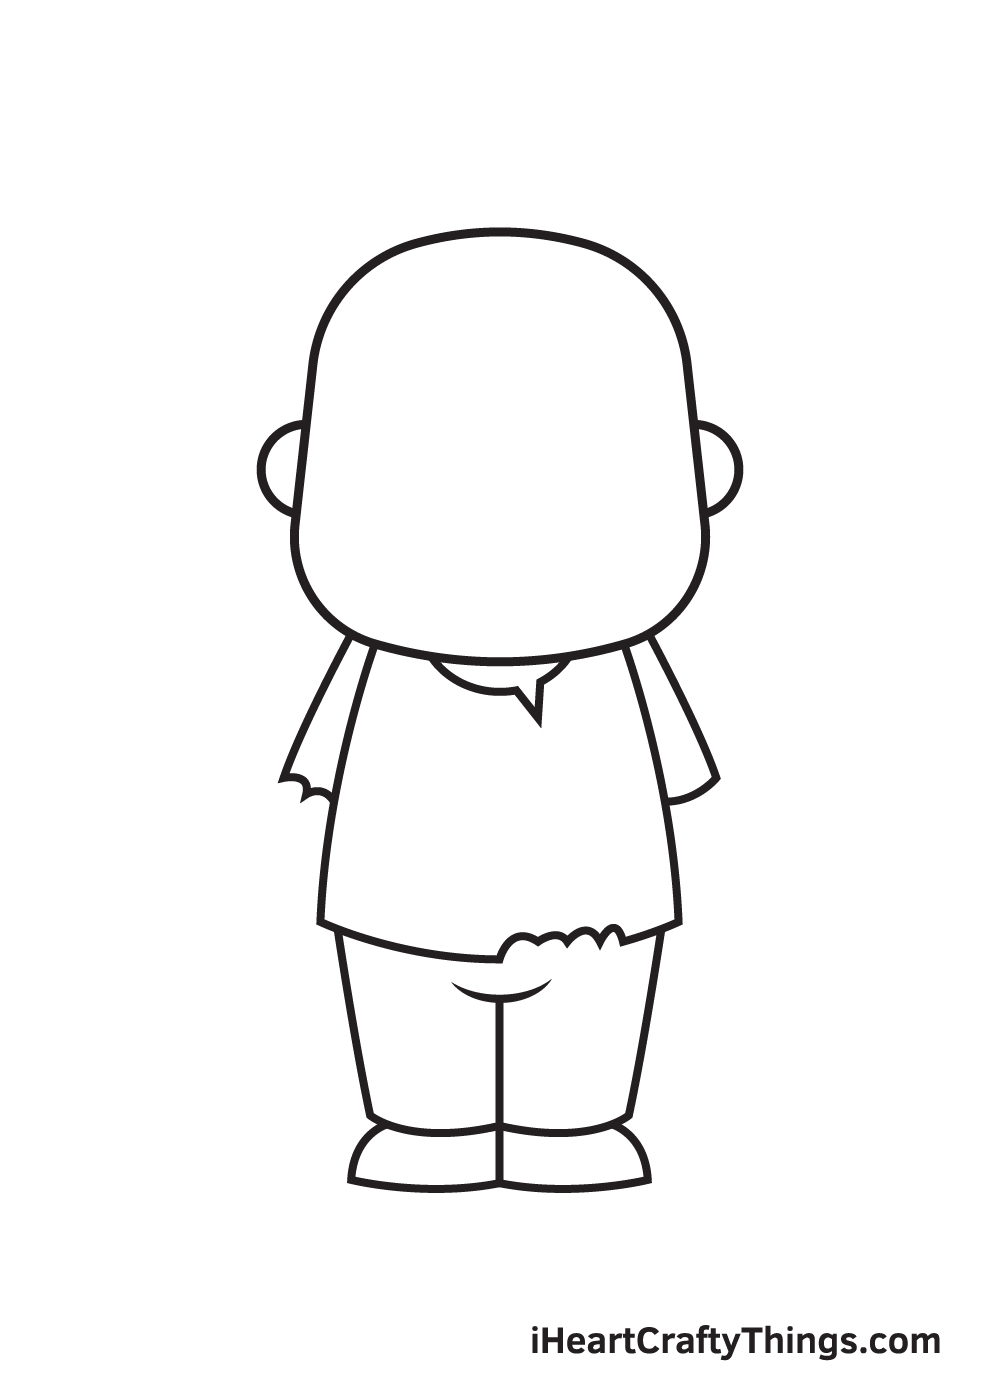
Complete the zombie's shirt by drawing a curved line on its neck forming the collar.
Subsequently, draw a diagonal line with a horizontal line at the bottom on each side of the zombie'due south body to create the sleeves of the shirt that the zombie is wearing.
Don't forget to add together some tears on the hem of the collar and the sleeves as well! This creates the illusion of damaged clothing, making your drawing appear more realistic!
Stride half dozen — Draw the Zombie'due south Left and Right Arm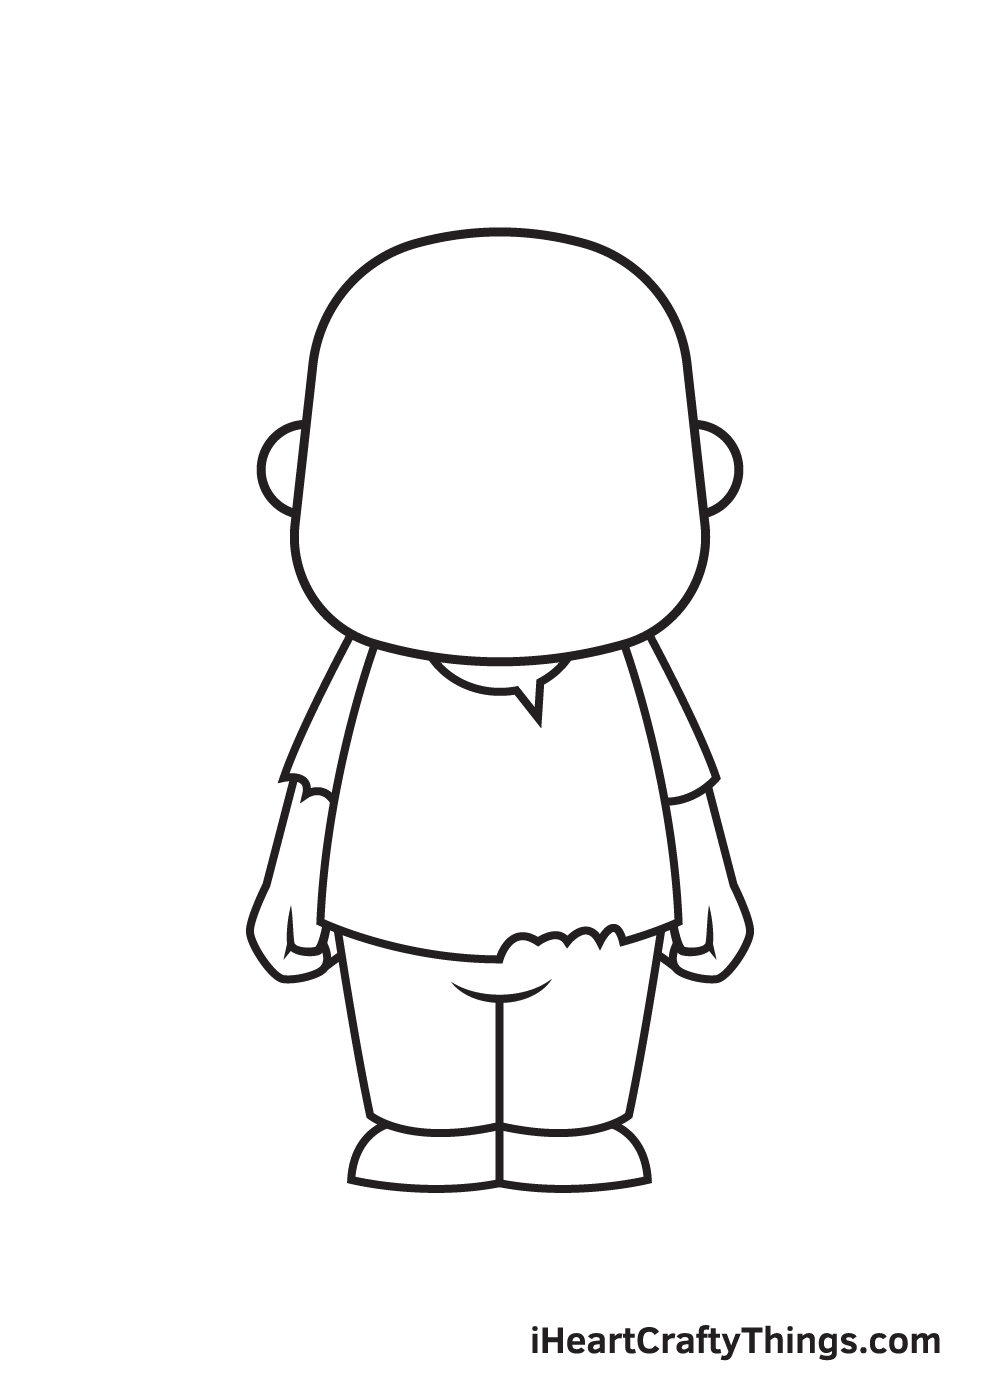
Draw an arm with a hand underneath each sleeve. Nosotros think the easiest style to draw a manus is to draw it in the form of a fist, so that's exactly what we've done in this stride.
Simply depict an irregular circle shape with edges and so depict some lines inside forming the thumb.
Stride 7 — Draw the Axe Struck on the Zombie's Head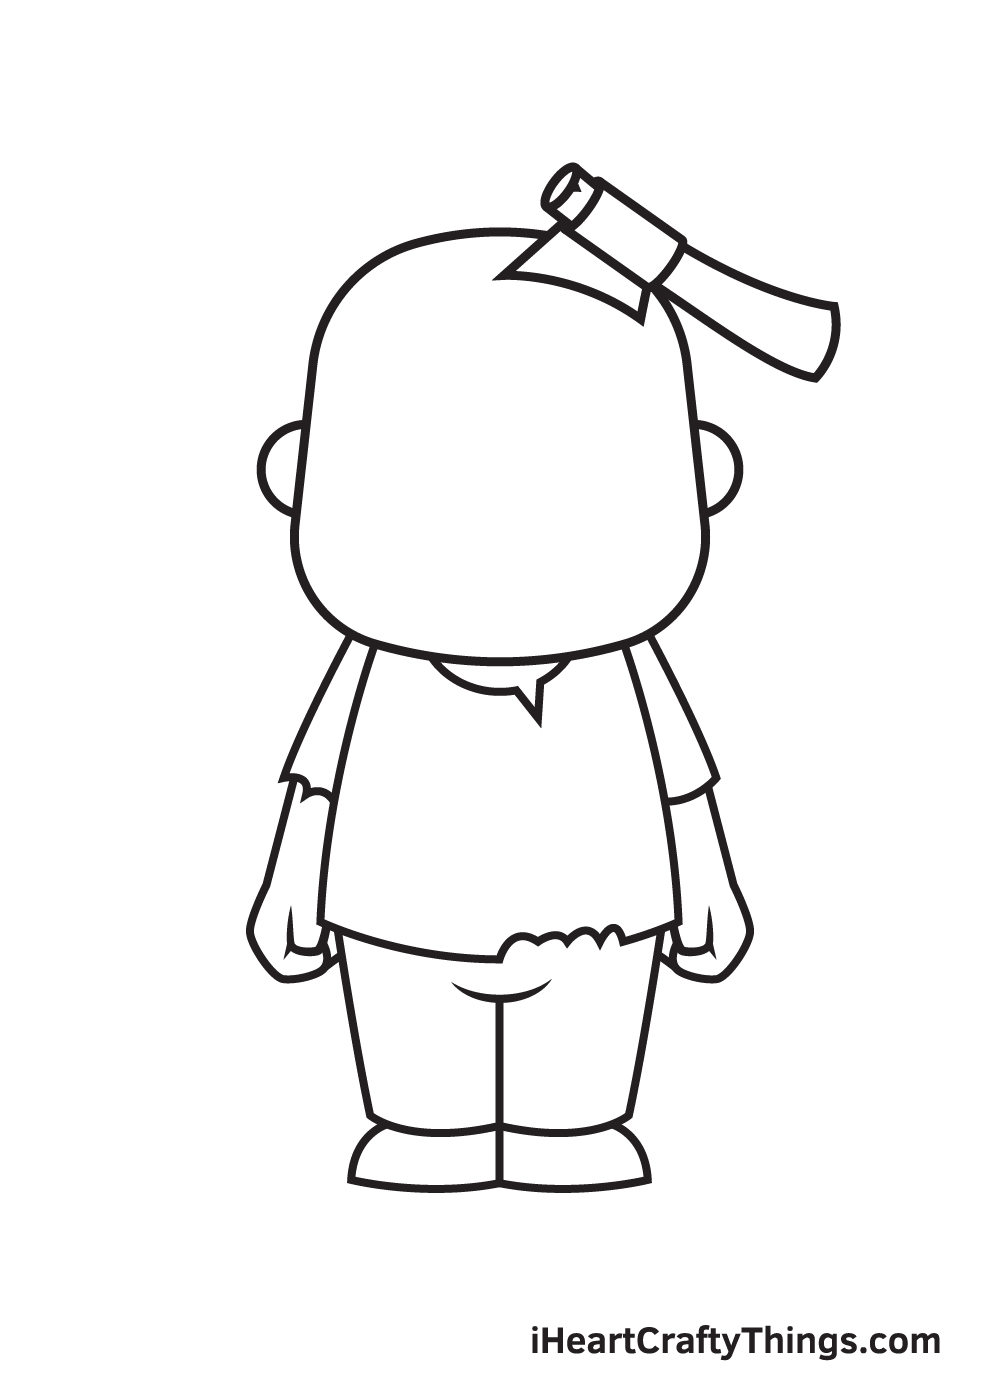
For an extra dramatic result, draw an axe struck at the top of the zombie's head. Since the axe was struck into its skull, the bract wouldn't be completely visible.
Zombies are basically people that have risen from the dead. That ways, the cause of their decease remains conspicuous.
In this case, this zombie was attacked in the head with a sharp axe. Information technology'southward quite brutal, isn't it? Nevertheless, information technology's what makes the zombie look more scary!
Step eight — Afterwards, Draw the Facial Features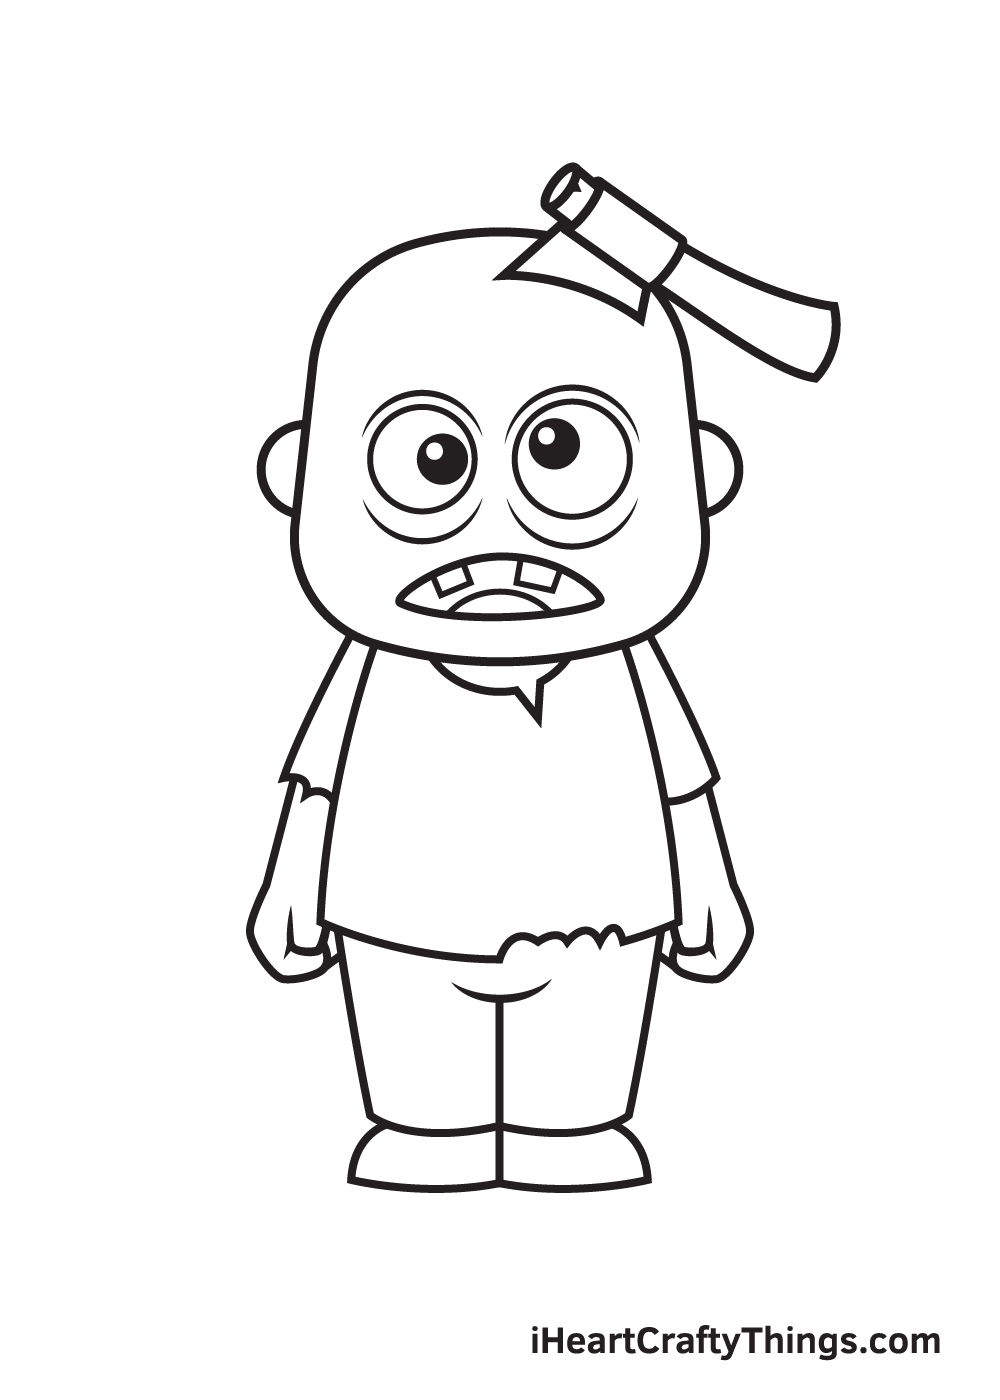
Moving on to the facial features, proceed by cartoon two circle shapes to create the eyes. Then, inside each eye, draw a smaller circumvolve shape in different positions.
This creates the pupil of the eyes. Shade the entire student while leaving out a tiny circle inside unshaded. Don't forget to add some lines surrounding the eyes to create the appearance of wrinkles!
Afterwards, depict a shape forming the zombie's mouth. Inside the mouth, draw a curved line at the bottom for the tongue and square shapes at the top for a few visible teeth.
Don't worry if the shape of the eyes aren't completely identical! Every bit a matter of fact, the more uneven they are, the more than terrifying the zombie'due south facial expression will look.
Footstep 9 — Now, Add Details and Texture on the Zombie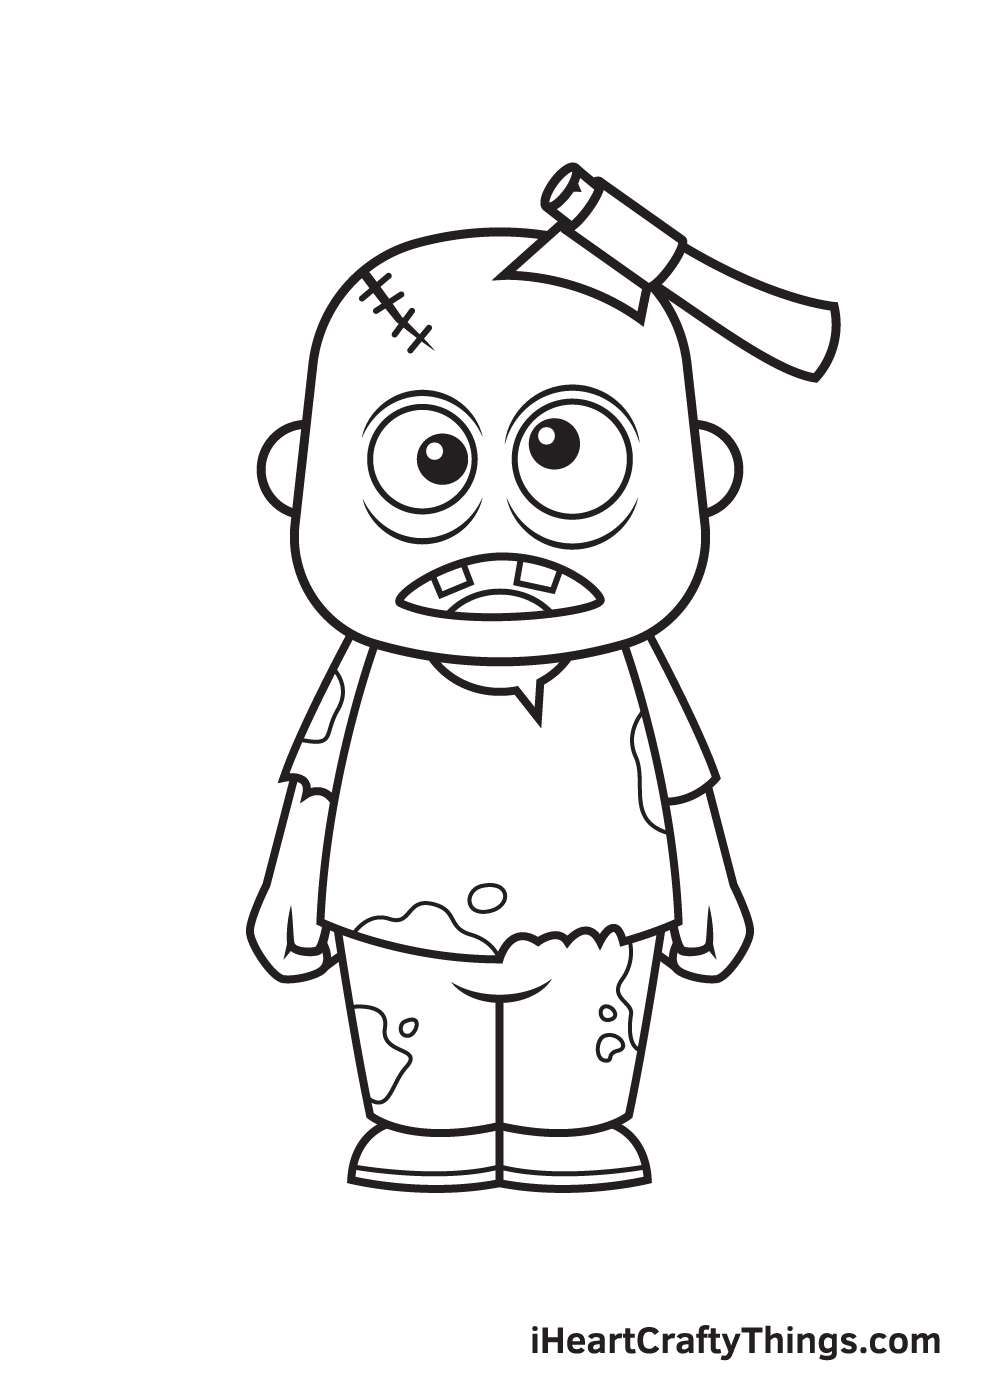
Make your drawing expect more than dramatic by adding a few more than patterns and details here and in that location.
Draw a line at the top of the caput with multiple brusk lines across it to create the illusion of a stitched wound.
So, add a few shapes in various uneven forms all over the shirt and the trousers. This creates the appearance of claret stains on the zombie'southward wearable, making it even more sinister!
There you have it—you take successfully drawn a horrifying zombie. At present, it's time for the long-awaited part, which is coloring your drawing.
Zombies are typically depicted to have green skin, mainly because of their rotting peel since they are basically dead people. Their clothes, on the other paw, are just like any other clothes a human would clothing.
Feel free to use any color y'all similar for the wearable, but make sure to make it announced as dirty as possible. Don't forget to color the blood stains with a dark shade of scarlet besides!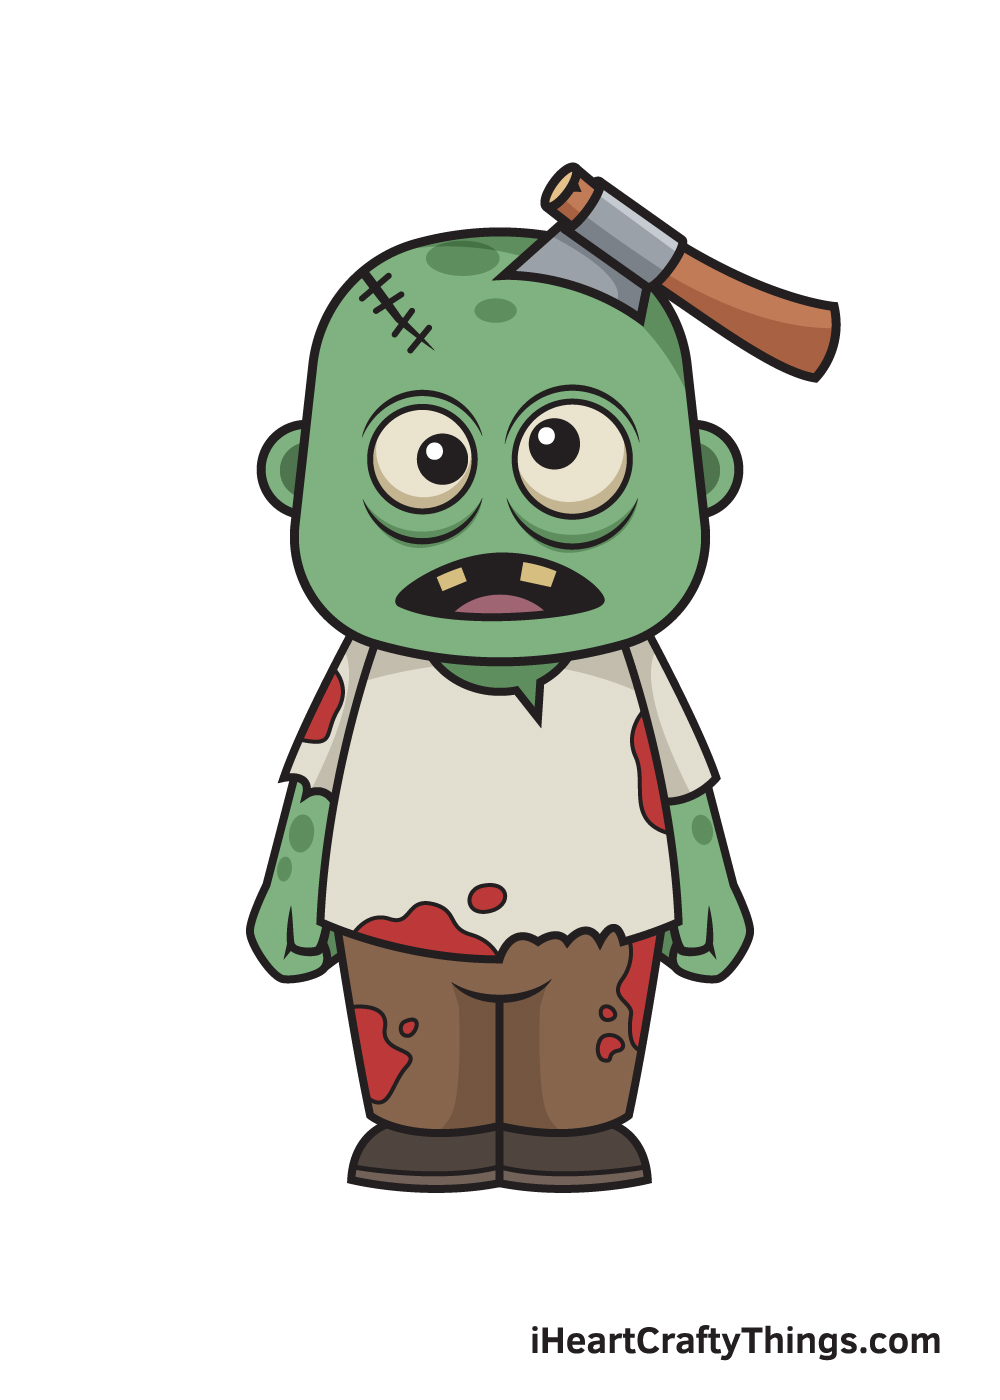
Your Zombie Cartoon is Complete!
If you lot enjoyed this drawing tutorial, and so yous might bask drawing a fairy, leprechaun, and other mythical creatures as well!
Get ahead and check out our "How to Depict" catalog to explore many more fun cartoon tutorials like this. Which legendary brute would y'all like to draw next?
In one case you lot've finished drawing and coloring a zombie, don't forget to show off your masterpiece!
Take a picture show of your artwork and share it on our Facebook folio and on Pinterest. Don't be shy—you've worked hard for it, so nosotros're sure it looks impressive!
We tin't look to meet your frightening zombie drawing!

Source: https://iheartcraftythings.com/zombie-drawing.html
Posted by: rothcomn1971.blogspot.com
0 Response to "How To Draw A Realistic Zombie Step By Step"
Post a Comment